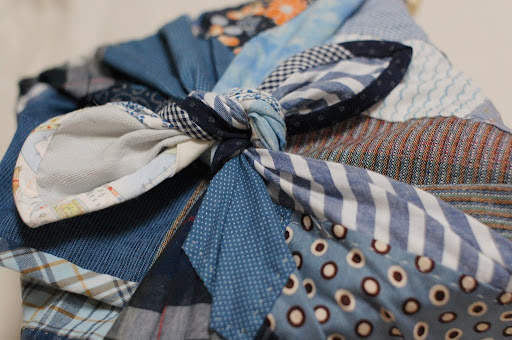
Today, I want to write how to sew my patchwork furoshiki.
I sew it like korean patchwork pojagi, but I don't know how to sew it, so this process is my original.
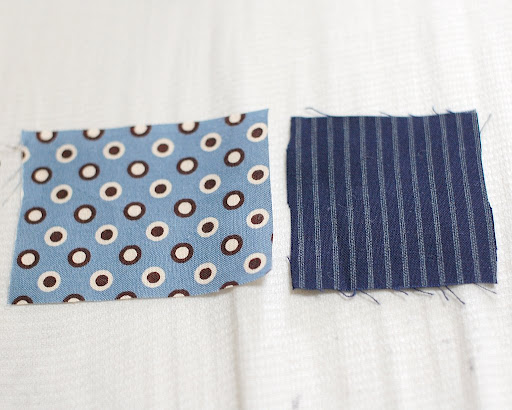
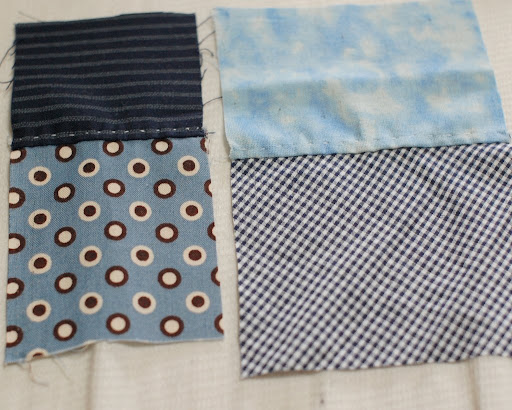
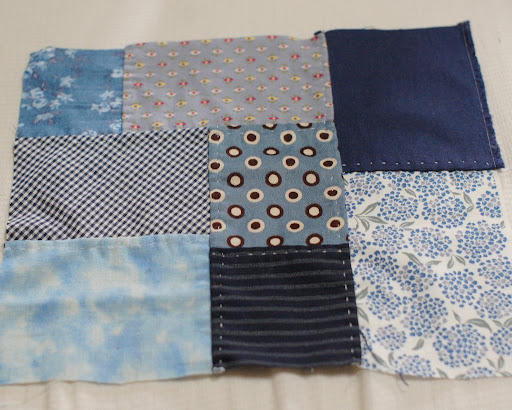
At first, make the center of the furoshiki. Cut two pieces of fabric of same height. I've never measured the size...I cut them according to the mood.

And then, lay the pieces with right side together, taking a 4-5 mm seam allowance for the one piece and a 8-10 mm seam allowance for another. And stitch the fabrics.
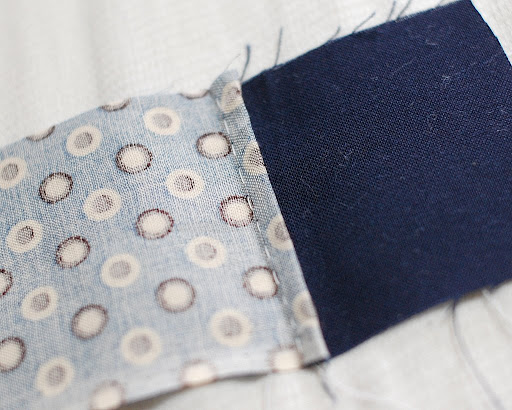
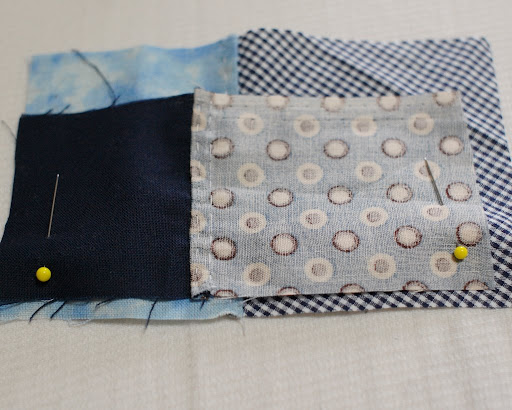
Fold the longer seam allowance to half, like upper photo.
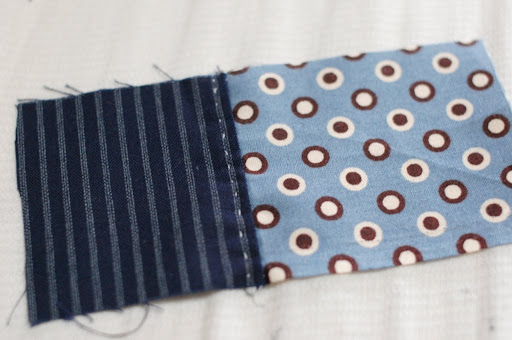
And then stitch the folded edge. You can see one stitch line from the upper side, and two stitch lines from the wrong side. The upper side becomes like above photo. This block is the first(center) block.

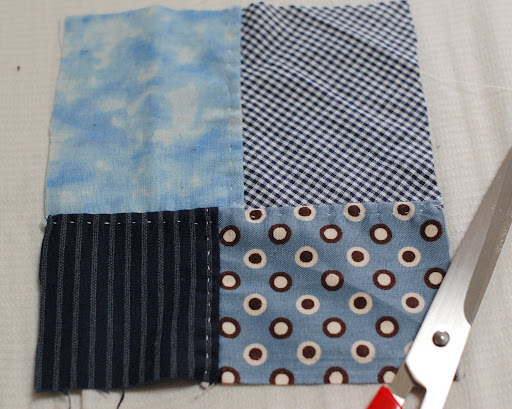
Then, go to second block. Cut two or three ( as you like ) fabrics as much length as the first block and the seam allowances. ( I've never mesure it and after I sewed the block, I cut to the right size.)
Sew the pieces like the first block. Mmm,,, I have to cut the right block a little bit, but after I sew them together.
Then, sew the first and second block each other, in the same way. Trim it to become a rectangle.
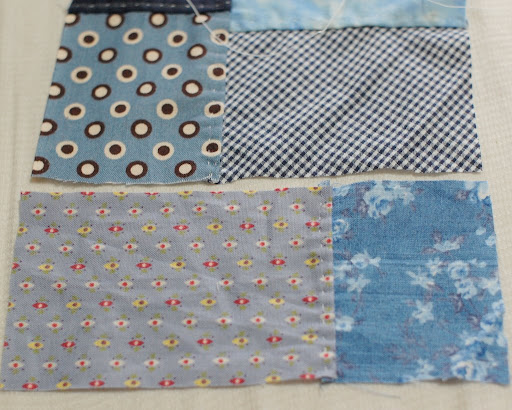
And then, go to the third block, and then, the fourth block...
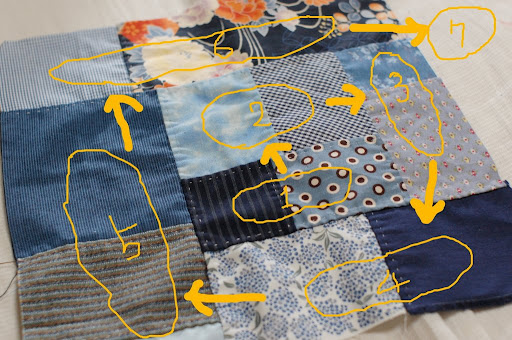
As above, sew the blocks in order like the photo to become the size you want. I make this about 23-24 inches size usually.
At last, trim it with a bias tape.
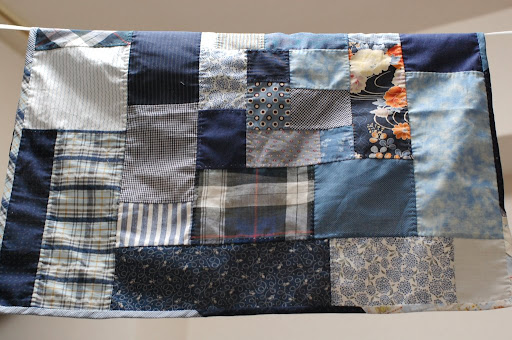
Finish!!!!!
It's difficult for me to explain this process in English...
But I tried it for my friend!
Thank you for reading this.
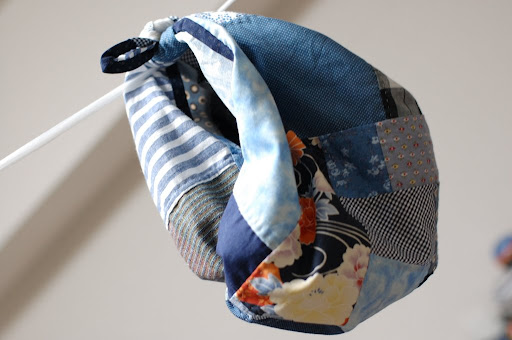
You can use this furoshiki as a cover, or as a wrapping cloth.
And sometimes, as a small bag.
I'll list up this furoshiki on my etsy shop.


42 comments:
I was wondering how you made these, seams and all. very good instructions, mai! and beautiful furoshiki. thank you!
Thank you annie.
I wonder if I could write good in English. Thank you!
Ok Mai I see now! Very handsome furoshiki. I am going to try my own.. I'll take pictures to show! Promise you won't laugh at me!!!!! Thank you for sharing! Perfect English too!
I got it! I love it as I love hand work. I will try at a slow time in my week. Thank you for sharing!!! I understood it very well!
Ooooooh it's so interesting to see how you sew these, I think it's amazing you do it all by hand! I am still learning how to tie the furoshiki, but I think I am getting better at it now ^^
Your instructions were very good. I am not good at sewing, always wanted to be, but think I will try at least a small patchwork piece.
The furoshiki is very beautiful. And the instructions are great.
ML
Hi cfp,
Thank you for your comment! I want to see what you make!
Hi eydie,
Thank you for understand my poor... English! I'm so happy to share the idea with.
Hello Clare,
Thank you for your comment!
If you have any problems to use it, Please send me a message. I'll try to explain you, with some pictures.
Hello ml,
Thank you for your comment!
It's not so complicated. It's simple, I think. So if you like to sew something, please try it.
If you have any question about sewing, please write me a comment!
I love this! I might try this method to make some quilt blocks.
Hello Alexa,
Thank you for your comment.
I'm making many furoshiki like this!
this is a lovely project - the colours and patterns you picked are very pretty. I would like to try it myself...
This is the most prettiest furoshiki I have seen in my entire life! And I have been to Japan 7 times. You are so clever! Thank you so much for posting your lovely tips! I will try to make one myself! Arigatou!
Love love
Hello Sandwich
xxx
Hello Bird Bath, Hello Sandwich,
Thank you very much!
Today I made new one. I should work 4-5 hours to make one furoshiki, but it's very fun for me.
Your blog and your art are so enchanting! What a simple and wonderful project for my 13 year old daughter. She is just learning to sew and wants to do some original designs. ThankYou!
your furoshiki is wonderful and you write beautifully. I can't wait to try making one! Thanks for the instructions..
Dear Mai,
it was wonderful to visit your site.My first visit.Your explanation and pictures make things very clear.I want to try this patchwork.Is Furoshiki and Pojagi kinds of quilted wrappings? thanks for sharing your beautiful japanese culture with us.
Beautiful blogpost with clear, detailed instructions; very inspirational! I've borrowed your picture of the finished furoshuki (with a link to you, of course)- hope you don't mind, but if you do, just drop a line.
that is so lovely. i wonder - do you use the same stitch to attach the bias edging as you do to sew the pieces together?
For the bias tape, I sew the front with normal stitch, and the back with blind stitch.
(* v *)!!!!!
Dear Mai, Since visiting your site ,I googled and found aboud Furoshiki.We use such wrappings in our traditions ,too.I was amazed by the similarity of thought in our cultures.Thanks for a beautiful tutorial and blog.
Sita
Thank you for the tutorial! :)
I learn a new word ... Furoshiki
Thanks Mai
I love this and will follow the instructions to make one
Mena :)
Excellent! My grandma uses furoshiki all the time to carry food she cooks to parties. I think I will make her a new one for her birthday in October. Arigato!
such a beautiful project and i am not great at sewing but with these lovely instructions i think i could make this! thank you so much. love your blog will be back.
susan
My son lived in Korea for 2 years and now loves anything Korean. I want to make him a quilt for Christmas using a Korean theme. In looking on the internet for Korean quilting, your site is the best and easiest to understand. Thank you for your step by step, EASY instructions. They are just what I've been looking for!! Thank you for sharing your talent with others!
What a great bag, and I love how you show to do the seams. Thanks!
At first I wondered why you folded over the longer fabric.You explained it perfectly.Your diagrams are very easy to understand.Thank you for sharing this.~Anne
I found your blog because I am interested in furoshiki and you show a beautiful way to create them. But I like the other things you make as well, they are so nice! I want to make those little sarubobo with my children, I am curious how they will look when we make them.
Thank you for sharing the way you make those lovely things!
great thing!! good job!!
you have a nice blog, i am really happy can be here
I will try at a slow time in my week. Thank you for sharing!!! I understood it very well!
I like your website. Thank you for great information. I will come back to your website again.
best regards
thanks to facebook, here, thank you so much for explaining !
love
I think it's amazing you do it all by hand! I am still learning how to tie the furoshiki, but I think I am getting better at it now.
Great information on your site here. I love this post because we can get some useful information from your blog. I expect more post from you guys.
I love this post because we can get some useful information from your blog. I expect more post from you guys.
rn to bsn program in hayward ca
Wonderful post. If only I'd of come across something as wise and straightforward when I was starting out! See you at the reading!
Wow....how creative!!!!!!!!!!!!!
iPhone app development company
Very good explanations!!
Just a note of thanks to let you know you are still helping and inspiring people all these years after you posted this. Your work is very beautiful and your generosity for showing how you made this is awe inspiring. Thank you very much for this!
Post a Comment