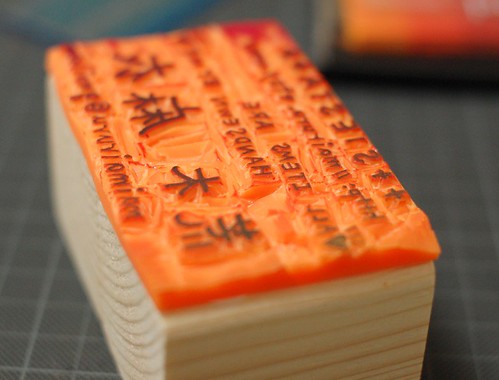
My friend in the U.S. (EmiShimosato) sent me some elastics for carving stamps.
I tried one of them, and it was quite good! It's much easier than Japanese rubber what I used before. I've never tried Japanese elastics for stamp...
Several days ago, I made this stamp for my name cards. Before then, I hand wrote every name card and it took long time (But I enjoyed it very much).
Now, I can make my name cards with this stamp.
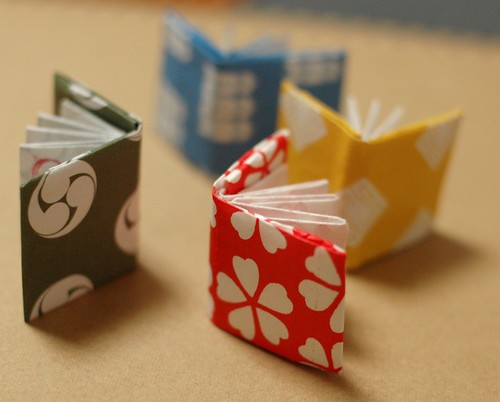
Now, I'm hooked on carving stamps, so I made these tiny books.
Each of them are from one piece of Origami paper. I found the tutorial in Youtube.
You need only one piece of square paper, so please try it. It's very cute!
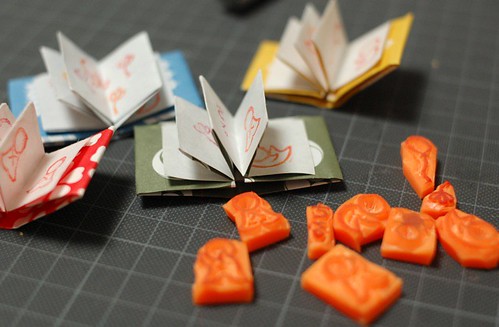
Then, I hand carved some sarubobo for the books and stamped them.
I like these tiny things. Then, I wanted to put them in Sarubobo's hands.
So I made small Sarubobo for them.
I put elastics to keep their books.
But my boyfriend says it's not good because the elastics are in their stomachs. But I wanted to hide the knots...
Anyway, I enjoyed making them! Thank you very much EmiShimosato!!!!
Sep 28, 2009
Sep 26, 2009
Sarubobo stamp tag and brooch
I made brooches with a flower and a sarubobo plush.
Before I put pins on their back, I came up with an idea.
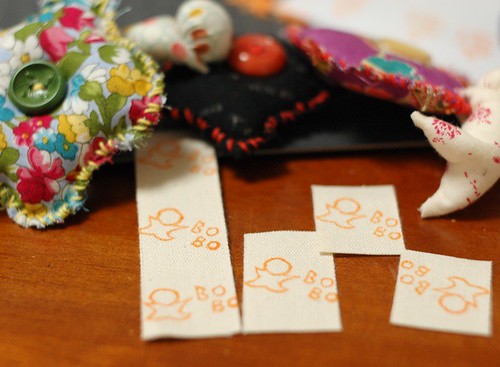
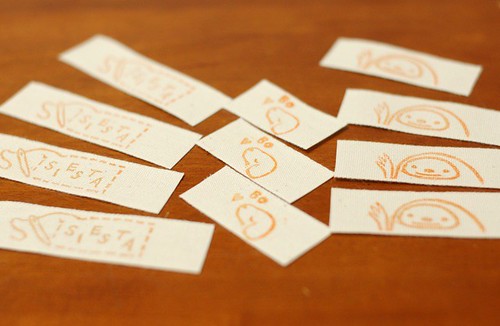
I carved a stamp of Sarubobo, and stamped it on cotton tape. (This tape is for stamping)
Then, I put a pin with it.
It's simple, but I could hide the stitching with the tag.
I made them thinking of floral scent. They should be enjoying it.
By the way,,,
It was my boyfriend's birthday the day before yesterday.
I baked cheese cake for him and made beef stew for our dinner. We enjoyed eating a lot with a bottle of wine.
But after we finished the dinner, I had terrible stomach pain. I couldn't sleep at all. I thought it was food poisoning or something, but my boyfriend was quite good...
Yesterday, I was still too bad and went to a hospital. The doctor said it should be food poisoning, but it's odd if my boyfriend is good.
We couldn't think of good reason, but he gave me some medicine for gastroenteritis. Now, I feel much better than yesterday.
Today I began to work again slowly. It takes much more time than usual, but some new ideas are coming up with me because of this slowness. Even though I made some mistakes in these two days, it was good experience for me.
I feel really appreciative of my boyfriend, because he was just with me (* v *)!!!!
Sep 23, 2009
Black leather pass case
I made a pass case for my boyfriend.
It's a birthday present.
It's of a very simple pattern.
This shape is good to hold and the hole makes it easier to take out the card.
I found the design here and made the pattern by myself.
-> http://epen.blog3.fc2.com/blog-entry-92.html
I like the process of polishing the edge and the back.
I put CMC (a kind of glue) on the back, then polish it with glass or a tool for it.
It takes long time and I cannot get the feel for it, but I'm enjoying it very much.
I also plan to go for a trip with him to a small island near Tokyo. And I'll make a birthday cake and beef stew for him tomorrow.
I’m enjoying celebrating his birthday (* v *)!!!!
We enjoyed this grape tonight. I like the autumn very much because it makes many kinds of food taste good.
Sep 19, 2009
SWANY and my new wrapping
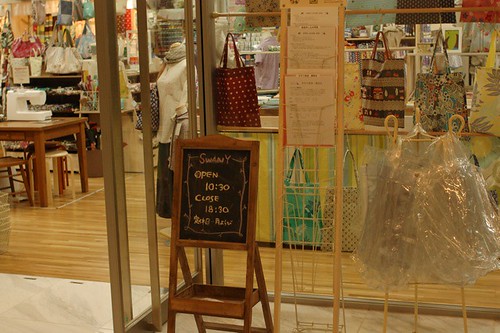
I went to SWANY with my boyfriend.
But it was 10 minutes before their closing hour, and I couldn't get anything. I just looked around the shop.
They have two shops in Japan, the main is in Kamakura, and the other one is in Yokohama, near this tower.
There are many types of fabric in their shop, and also, they have lots of their original patterns.
In the shop, there are lots of their works with their patterns. We can get the patterns according to our purchases.
Several days before, I sent a pattern of pants and black linen fabric to my mother. I love their linen fabrics.
I also got some fabrics from their online shop recently. The white linen is for my clothing, and wool fabrics and cotton print are for my shop. They gave me a DIY kit of a pouch as a gift (* v *)!!!!
I'm getting too much fabrics recently... I should sew more and more.
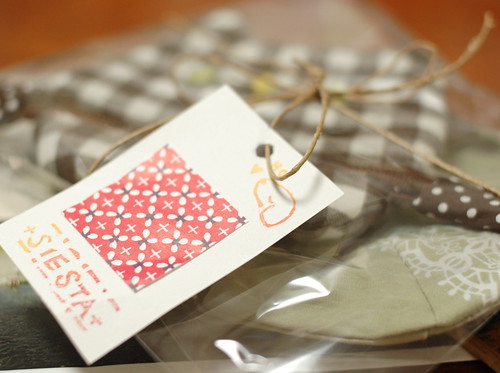
Yesterday, one idea came up to my head and I began to make these tags in the midnight.
I used my word card what I got to remember English words.
I paste a piece of Origami on them, and stamped my hand carving stamps.
I use them for wrapping my items.
It seems better than before.
From today, it's five day holiday in Japan. Today we went to a big public bath and relaxed a lot. There were many types of bathtubs, I also could sleep in a bathtub (* v *)!!!!!
Because I remain seated all day long, my legs are swollen badly. But thanks to the bath, my legs get better.
Have a good weekend to you all!
Sep 15, 2009
Leather craft and stamp tags --> My new pouches!
Recently I hooked leather craft and carving stamps.
In these two days, I made this passport case with two colors of leather.
I got the small pieces and they were short for the original pattern.
So I arranged the pattern a little.
I enjoyed hand stitching on leather. It takes much more time than fabric, but it's fun.
I liked this book because it has many detailed techniques.
And yesterday, I got stamp ink for fabric and cotton tape for stamp.
So I made these tags. I ironed after stamping, so they don't disappear.
The center one is Bo-chan stamp!
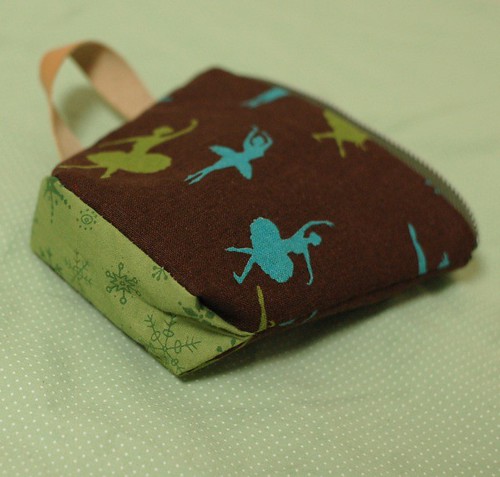
I wanted to use the tags, so I made up these pouches soon.
I also put leather handles on them, because I wanted to use leathers also.
I liked the bottom.
I love this cotton linen fabric from SWANY. It's just beautiful!
Thank you for reading.
I'm enjoying a lot!
Sep 13, 2009
How to make a pouch with/without a leather strap
Finally, I can post it.
There are many many pictures and it's very long... I'm sorry.
You can make the pouch with a leather strap, or without it.
You need only two patterns, one is for the body, and the other is for the top for the drawstring.
The body is 14cm x 26cm without the allowances, so if you put 5 mm allowance for each, you cut 15cm x 27cm. You need it for the outer fabric, and the inner fabric. My outer fabric was thin, so I cut also adhesive interlining as the same size and iron it on the outer fabric.
You need two pieces of the top, and the pattern for them is 10cm x 14cm without the allowances (with 5mm allowances, 11cm x 15cm).
I cut also two pieces of lace as the width of body fabrics to decorate the bag. I also made covered button with the top fabric for the decoration. But this post is too long so I write in another post how I made them.
At first, draw the line of the center, then mark 1cm from the center and 3cm from it(See the picture). The 1cm line is for the gusset, and the 3cm is where you put the lace.
Then put the lace on the mark, and sew at the edge of it.
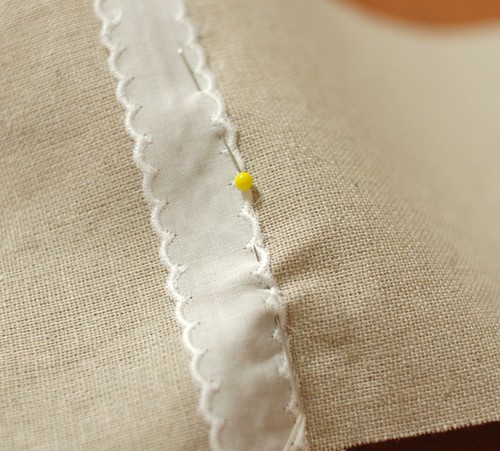
I put two pieces, for both sides.
Then put two covered buttons on the lace of one side.
I put two buttons.
Then prepare the top. Fold bth sides of allowance like the picture.
Sew the edge line as the picture from 3cm from the one side to 3cm from the other side.
Then fold it like the picture, and sew at the edge of the rest 3cm.
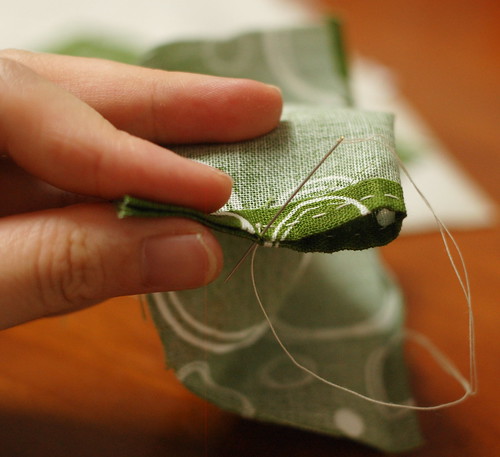
Sew 1mm from the edge like the picture.
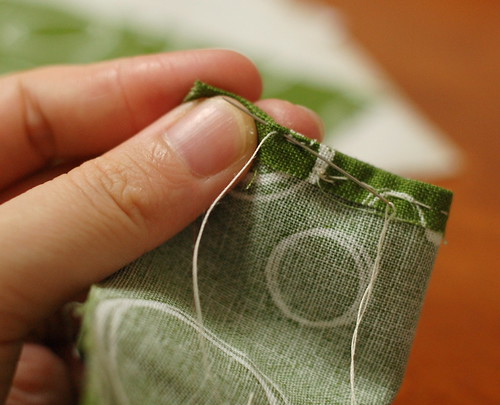
I finished it.
Do the same for the other side, and turn it out.
Sew 1.5 cm from the top. This makes the space to put drawstrings.
I made two tops.
If you put a strap, cut two pieces of string or tape, in 3cm. Fold it in half and put it on the outer fabric, 1-1.5cm from the top.
Baste them on both sides.
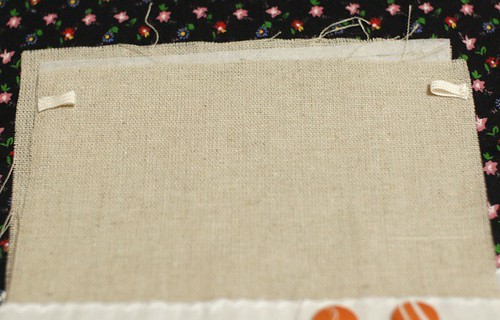
Then, put the inner fabric, top and the outer fabric as the picture.
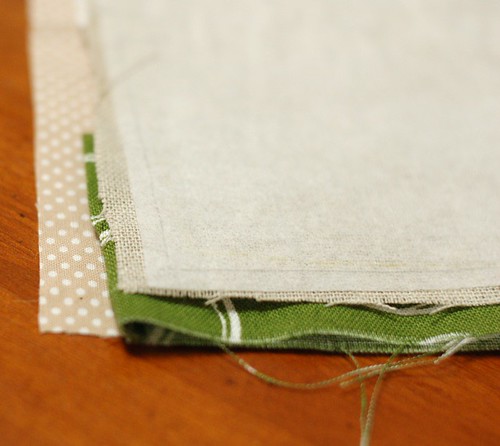
Then put dress pins like the picture.
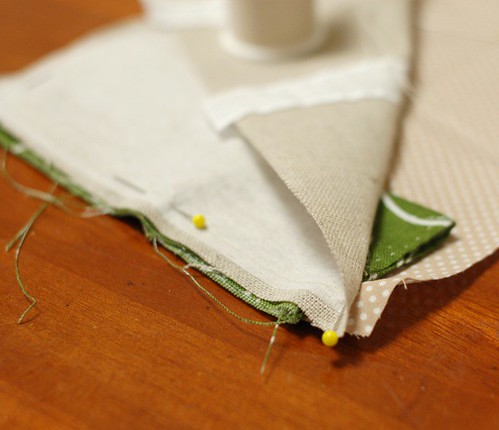
And sew the line. I sewed with half back stitch.
I finished the one side. Then sew the other side in the same way.
Fold it like the picture to sew the side lines.
To leave the opening space on the inner fabric side, begin sewing from 4-5 cm away from the bottom to the bottom.
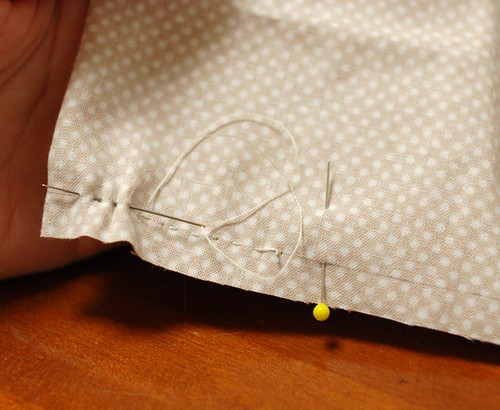
Then, sew from 2-3 cm from the top to the outer fabric. Continue sewing to the bottom of the outer fabric.
So you can make the space to turn it out.
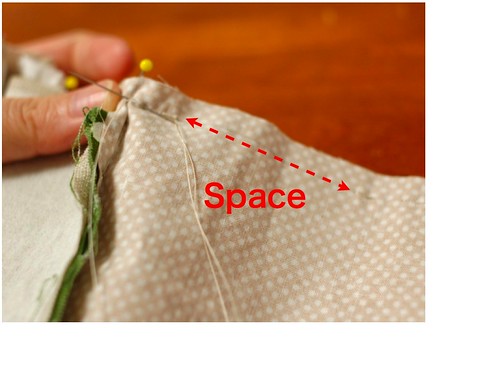
Then sew the other side. It's better to sew from the center to make it neat.
Then to make the gusset, take one edge like the picture opening the allowance.
Take the edge of outer fabric also in the same way, and put them together facing the allowances.
Sew it from the 1cm line you drew at first to the other 1cm line.
You made one gusset.
Do the same for the other side.
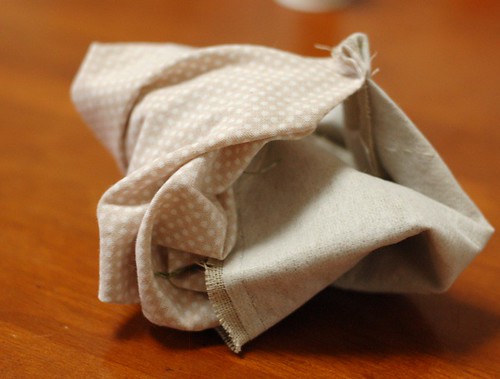
Turn it out from the space. You are around the corner.
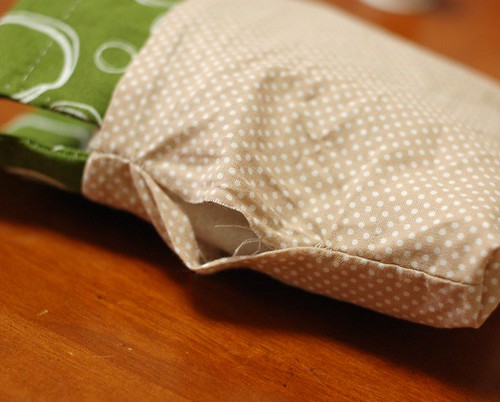
Sew it little by little from the bottom (It's easier than begin from the top). Sew one stitch for the one side,
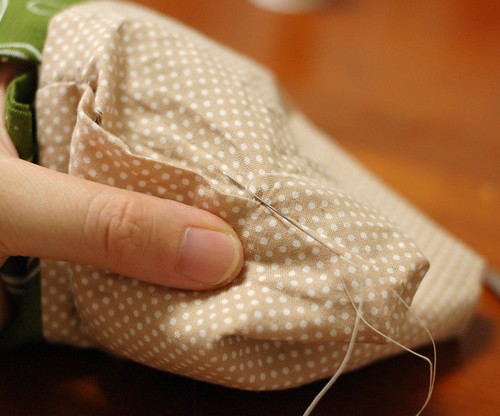
Then sew one stitch for the other side. Continue this.
You finished closing the space.
Turn it out and put the strings on the top. That's all!!!!!
The orange one is with a strap.
I like this fat shape (* v *).
If you have any questions, please leave a comment here.
Thank you very much for reading this long long post.
Have a good day.
There are many many pictures and it's very long... I'm sorry.
You can make the pouch with a leather strap, or without it.
You need only two patterns, one is for the body, and the other is for the top for the drawstring.
The body is 14cm x 26cm without the allowances, so if you put 5 mm allowance for each, you cut 15cm x 27cm. You need it for the outer fabric, and the inner fabric. My outer fabric was thin, so I cut also adhesive interlining as the same size and iron it on the outer fabric.
You need two pieces of the top, and the pattern for them is 10cm x 14cm without the allowances (with 5mm allowances, 11cm x 15cm).
I cut also two pieces of lace as the width of body fabrics to decorate the bag. I also made covered button with the top fabric for the decoration. But this post is too long so I write in another post how I made them.
At first, draw the line of the center, then mark 1cm from the center and 3cm from it(See the picture). The 1cm line is for the gusset, and the 3cm is where you put the lace.
Then put the lace on the mark, and sew at the edge of it.
I put two pieces, for both sides.
Then put two covered buttons on the lace of one side.
I put two buttons.
Then prepare the top. Fold bth sides of allowance like the picture.
Sew the edge line as the picture from 3cm from the one side to 3cm from the other side.
Then fold it like the picture, and sew at the edge of the rest 3cm.
Sew 1mm from the edge like the picture.
I finished it.
Do the same for the other side, and turn it out.
Sew 1.5 cm from the top. This makes the space to put drawstrings.
I made two tops.
If you put a strap, cut two pieces of string or tape, in 3cm. Fold it in half and put it on the outer fabric, 1-1.5cm from the top.
Baste them on both sides.
Then, put the inner fabric, top and the outer fabric as the picture.
Then put dress pins like the picture.
And sew the line. I sewed with half back stitch.
I finished the one side. Then sew the other side in the same way.
Fold it like the picture to sew the side lines.
To leave the opening space on the inner fabric side, begin sewing from 4-5 cm away from the bottom to the bottom.
Then, sew from 2-3 cm from the top to the outer fabric. Continue sewing to the bottom of the outer fabric.
So you can make the space to turn it out.
Then sew the other side. It's better to sew from the center to make it neat.
Then to make the gusset, take one edge like the picture opening the allowance.
Take the edge of outer fabric also in the same way, and put them together facing the allowances.
Sew it from the 1cm line you drew at first to the other 1cm line.
You made one gusset.
Do the same for the other side.
Turn it out from the space. You are around the corner.
Sew it little by little from the bottom (It's easier than begin from the top). Sew one stitch for the one side,
Then sew one stitch for the other side. Continue this.
You finished closing the space.
Turn it out and put the strings on the top. That's all!!!!!
The orange one is with a strap.
I like this fat shape (* v *).
If you have any questions, please leave a comment here.
Thank you very much for reading this long long post.
Have a good day.
Subscribe to:
Posts (Atom)