I'm not so good at carving, but I'd like to show how I did it.
I hope it would help you.
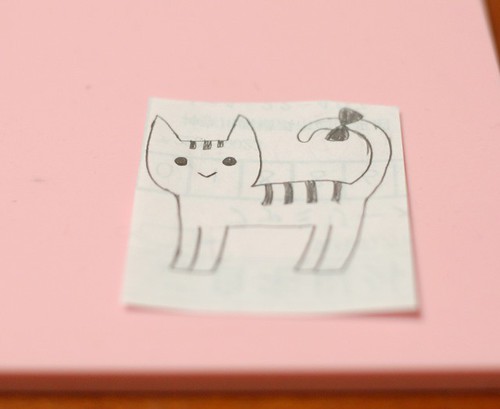
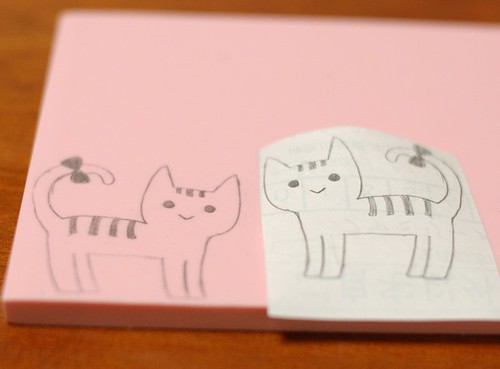
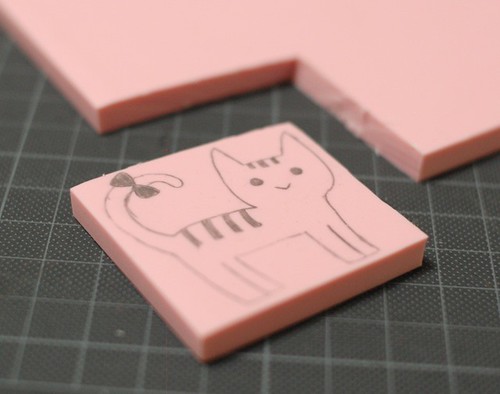
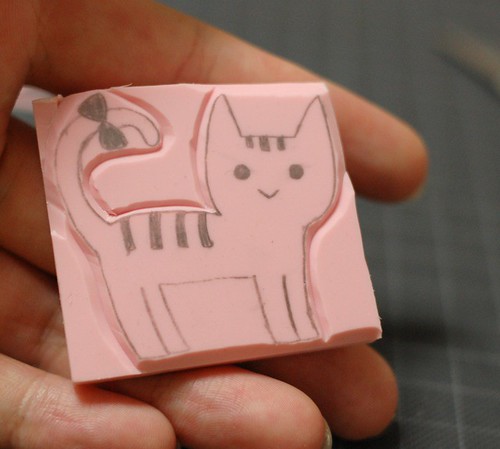
At first, I draw a design, this time, a cat. To copy it on the eraser, please draw it with pencil.
Then put it on the eraser and scratch it well.
I copied it.
I use this OLFA cutter knife for carving.
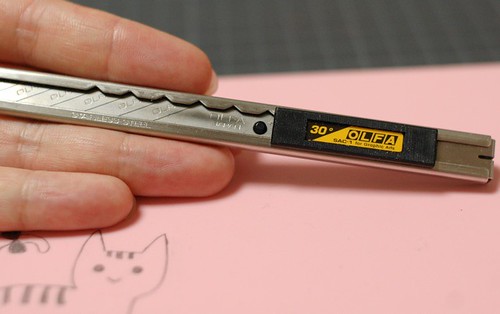
The tip of the knife is sharper than usual cutter, and it makes easier to carve detailed design.
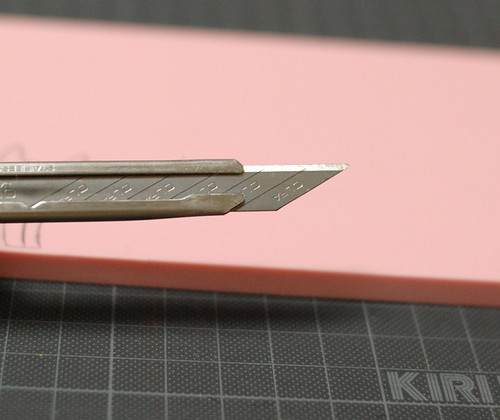
You need only cutter knife, eraser and a cutting board. If you have carving knives, it will make it easier.
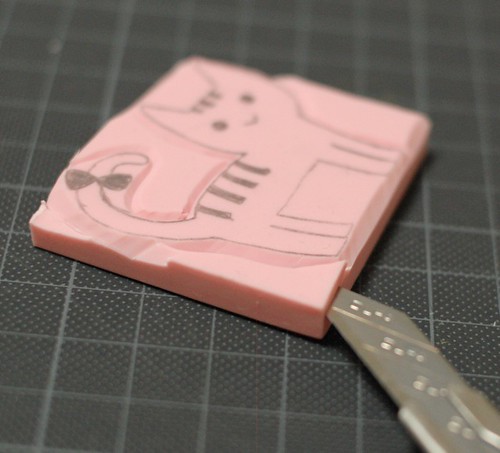
I cut the piece of just around the cat.
Then, begin from the outline. The most important thing is the angle of the knife.

Like the picture, cut at the line at a 45 degrees (or so) angle.
Then cut it from the outside with the same angle.
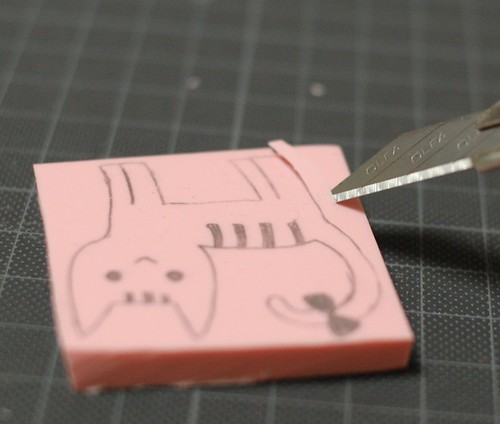
You should have carved like "V". It makes stamp sturdy.
Conitue it.
When you cut the outside of the outline, put the cutter knife like the picture.

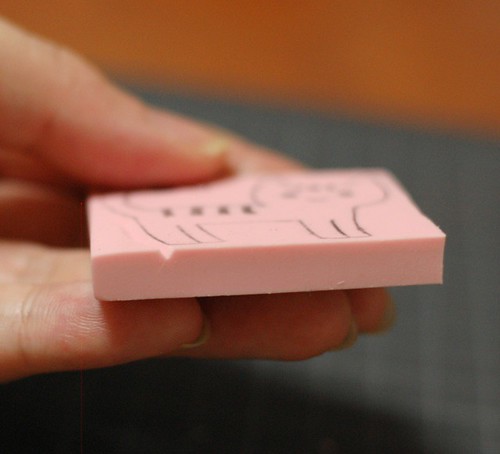
I finish the outside of the cat. I couldn't cut near the tail, but if you use the carving knife, it should be better...
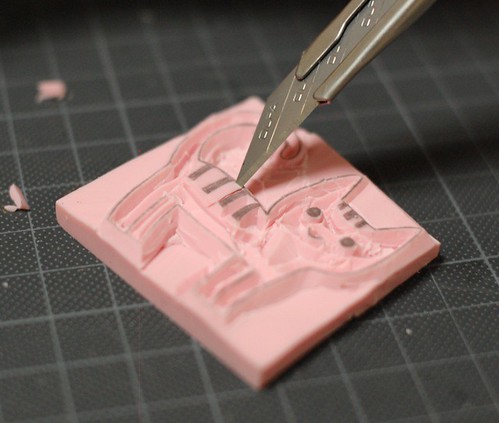
Then go to the inside with the same way. When you carve the detailed place, please carve it lightly.
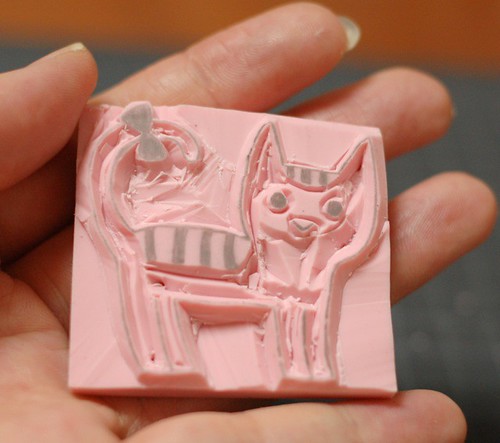
I finished it!
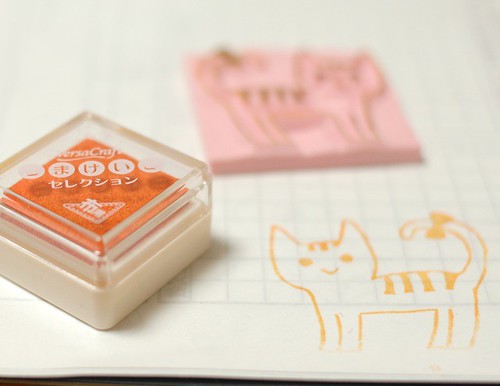
I stamped it on the fabric with the ink for fabric.
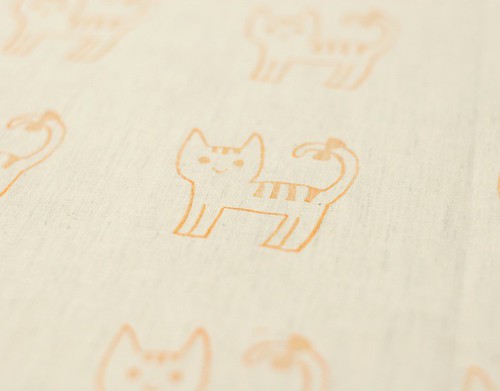
It doesn't disappear if you iron it after stamping. I love this ink.
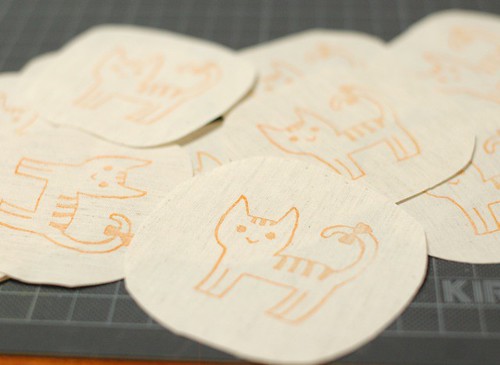
Then, I cut them all.
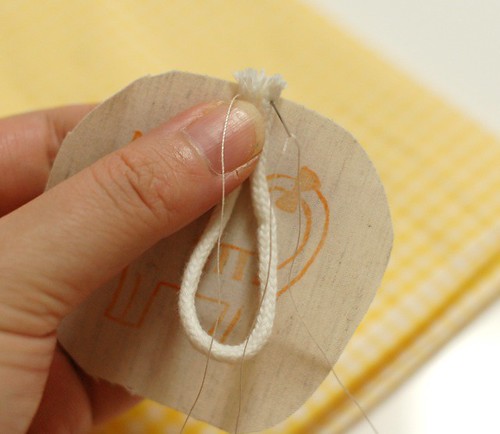
And put a cotton code on the top.
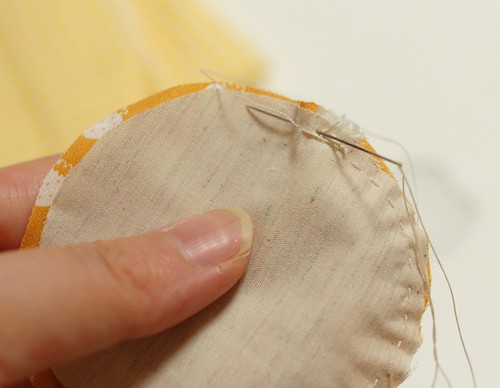
And I sewed with the backside fabric leaving a space to turn it out.

I closed the opening.
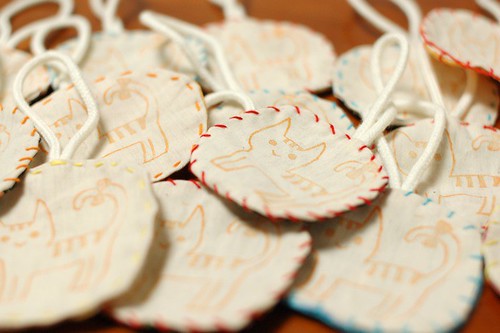
At last, I decorated them with Sashiko stitch.
They are for my customers. I put them for whom get 20 dollars or more.
I carved only about 10 stamps. It's easy to begin and you can make your original design with them. Please try it!
Have a good day.
I'm going to go for a trip from 4th. October. I'm really excited now. But it would be rainy days...


39 comments:
That's really cute! I love your projects!! Look at the cat sarubobos I made http://princesspyro00.deviantart.com/art/Rainbow-Kitties-138829101
It's so sweet!!!
Thank you very much for the tutorial. Damn, I MUST make some stamps no! ;D
And the gifts for your costumers look sweet. :)
wowwwww is fantastic!!! thanks to idea :-)hugs Ely
Dear Mai, thank you for the step by step and being such an inspiration to me. :) I adore your kitty tags. I will want to really try this as soon as i find a craft shop that sells these stamping rubber. Have a lovely merry happy day and love to you!
your photographs are beautiful. love the kitty tags!
Hi Mai, your stamps are so beautifull! you've really got a good hand to make it so perfectly! Please, tell me where did you got the rubber, and what is its name, just to see if I can find it here in France... thanks a lot!
Thank you for the tutorial - the cat stamp is just adorable and the tags are so charming!
--Vicki K.
Oh goodness those are so cute! Thanks for the info on the carving process - I've never thought to use an xacto as i thought i would chop my fingers off! I was never happy with the carving tool though so I'll have to try this.
Hi! I really love your blog, your photos and your stuff!!! I really appreciate your tutorials,they're wonderful and more wonderful is the people who share their knowlegde with others,n__n I'm just making a pen case but I have a problem: I don't Know how to close the "final space" with some seam that looks good,you could please tell me how? I'll be very grateful!!! ^^
Hugs from Mexico (and sorry for my bad english)
Hi Mai,
Did you go to the hobby section of Yodobashi-camera Yokohama 6th floor? Not a GANPLA corner. On the other side, there is a corner for other PURAMO's, and there is good tools. I bought a some small knifes and such items may help your work. It sold for hobby there but seems originally made for surgery.
http://feather.co.jp/jMedical_Surgery.htm
I have scalper type, No. 10, 11 and 12.
It's cost about 300yen each, but it's worth to pay. It is double edged and very sharp.
I just found your blog. You make some adorable items :O) I love the little bags with buttons, and these kitty stamp ornaments are so cute! I'm going to visit your shop now. I admire that you seem to do everything by hand.
sei troppo brava!!!!!!^__^
Thanks for the tutorial. Soooooo cute!
lovely tutorial, this is soo helpful. i love all your projects=)
hoy me he dado un festival de trabajos maravillosos, creatividad,eres maravillosa, admiro a muchas amigas, pero tú eres fantástica, te felicito, me encantó visitarte y desde hoy me tienes como tu fiel seguidora, un abrazo a tu familia y tambien a tus gatos son bellos, tus fotos facinantes
Inspiring ~ Always a pleasure to visit your blog.
Thank you.
wonderfull work. have a nice day!
Thanks for this tutorial. It always looks so easy when you show us how you make things.I appreciate your photos and your work very much and love visiting your blog. Greetings from Germany!
Hello Daniela,
I got it from my friend.
It's this!-> http://www.in2art.com/art-supplies/speedball-speedystamp
I hope you could find good eraser for your craft.
Hello Mai,
thanks for the information. In fact, I also asked to your friend Kyoko, and she'd gave me the link. I've just made an order. I'll show you when my stamp is finished!
Thanks a lot!
Hello Graka,
It's not so difficult, but I also couldn't do it well at first.
You can see the process here.
http://www.teddybeargallery.net/lesson/cotton/c_konoji.html
It's written in Japanese, but I think you could understand the way from the pictures.
I'm sorry I cannot find the English word of this technique.
Hello Daniela,
Oh, she is the person who gave it to me!!!!
I'm happy you could order it.
Great job!!I'm love it^^. Thanks a lot for the tutorial.
THANKS MAI!!! Is really easy understand with the photos =D
You're not so good at carving? Are you kidding me? This is fantastic and so well explained. Thanks so much, I know of a couple people looking for eraser carving tutes, I'll be linking.
very, very nice. thank you!
oh that's great! I've been into a stamp thing lately, but had never even heard of eraser board like that. the cat is so cute! love it!
Thanks so much for posting this tutorial. I appreciate your generosity.
I really need to start doing this...I have all the equipments...but carving it seems scary :) You've done a wonderful tutorial :) I might even try it tonight ;)
REally cute and a very well made tutorial too.
tahnks for sahring this.
Amélie, Lyon, France
Ps: first visit here but i'm sure to visit again!
This so so sweet, thankyou for sharing :)
Hanna
For a long time, I have been wondering how to make a stamp without buying one! (I'm really cheap)This is so cute and clever! Thank you!
These directions and photographs are inspirational. Thank you so much.
Hi! great photos! I was wondering what ink pad you use? Do you know if you can use any kind of ink, then iron to make permanent?
Thanks so much for this post, pretty helpful data.
It's so lovely and cute!
Thank you for this post!! I've been looking for a long time around the net, searching for something like it!!
So easy and understable (not sure if this word really exists xP)
Thank you!!!
Thank you for your lovely idea! This is very cute and seems easy enough, however I can't possibly find this flat eraser material here in Utah USA
Any ideas?
Lynda :)
Post a Comment