A woman sent me an email about this project and I decided to write this post.
I have lots of small pieces of fabrics, and I usually make bias tapes or patchwork strings with them.
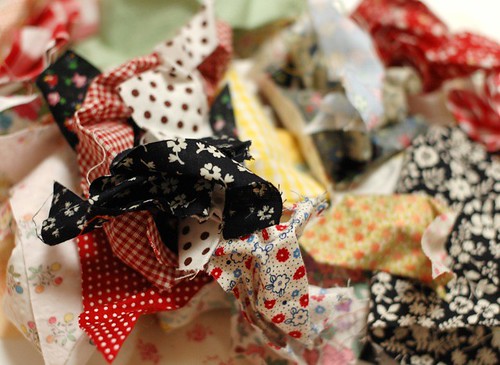
This time, I write here how I make the patchwork string.
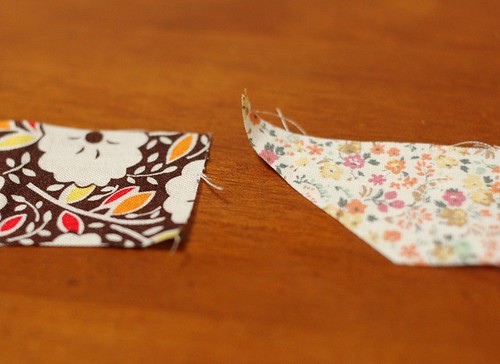
I chose some pieces from the scraps, and ironed them. Then cut it in strips. I cut them in 1.5 inches width.
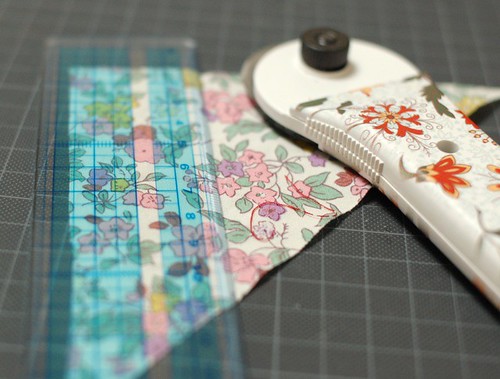
I cut these pieces. Some of them has not vertical edge, because it's a rest of my bias tapes.
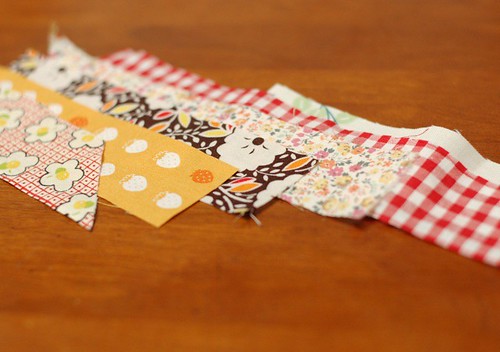
Sew them one by one.

To make it sturdy, it's good to sew two times at the edge using back stitch.
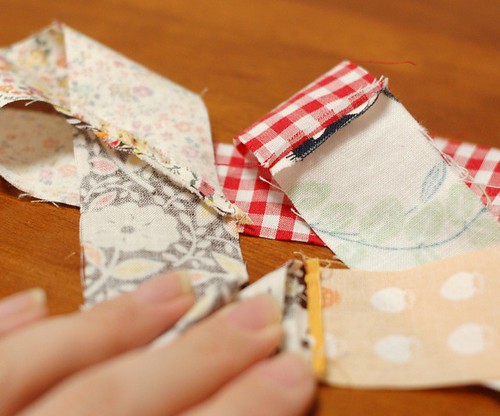
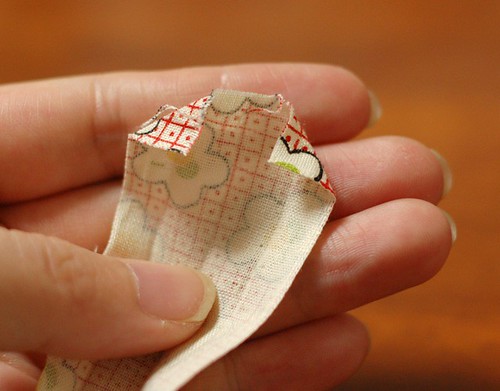
If you want to use the bias edge like the picture,
put it on the other side fabric making both fabrics's right side upside and cut the edge in the same shape.

Then put them facing their rightside, and sew it.

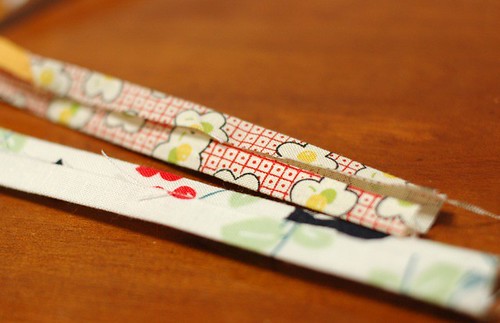
Open the allowances and iron them.
Then, fold it in half and iron it.

Open it once, fold each side in half and iron it.
To make the beautiful edge, follow next steps. At first, fold the edge a little.
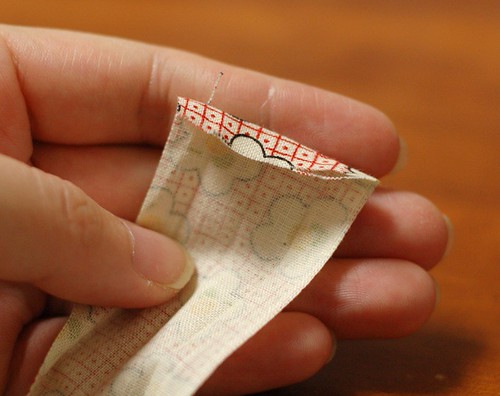
Open it and fold each corner making triangle.
Fold again at the line of first step.

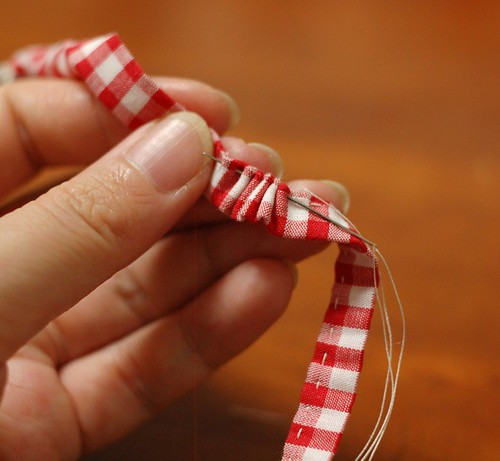
Fold each side and begin sewing.

Continue sewing...
Finished!
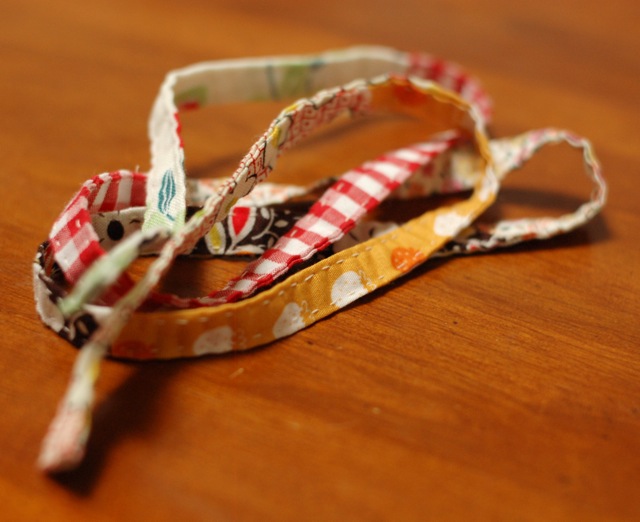
I use it to tie something, or...
as a bracelet,

or, as a charm of the bag.
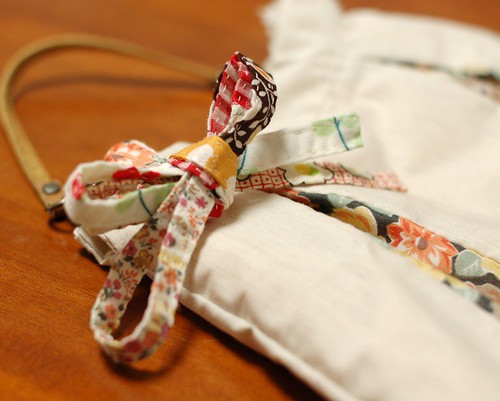
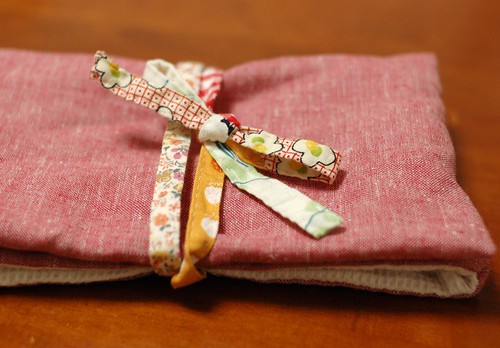
Or, it can be used as a drawstring for a bag.
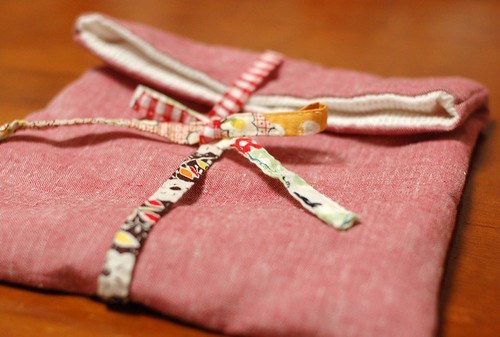
This is very simple bag and the patchwork string fits well on it.
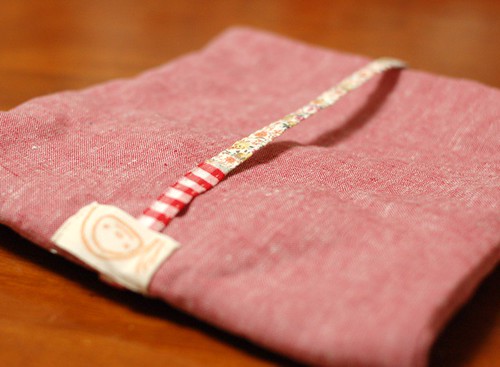
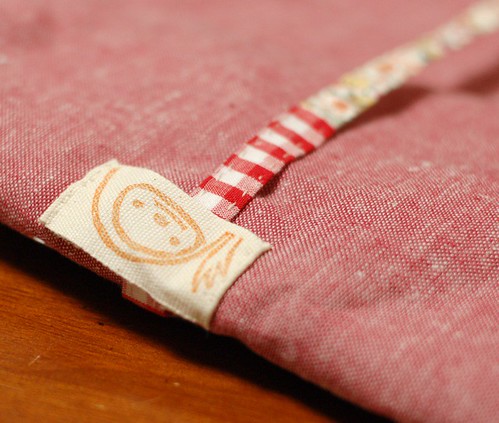
I also put my hand carved stamp tag on the back.
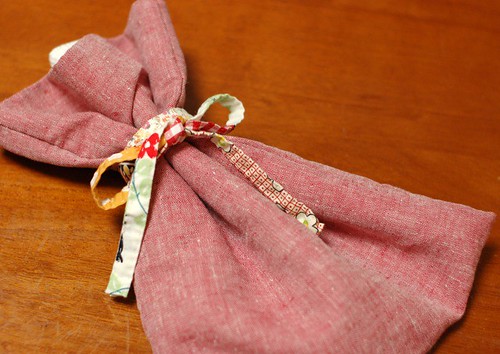
You can close this bag like the picture too.
To make this bag, you need only two pieces of fabrics in the same size.
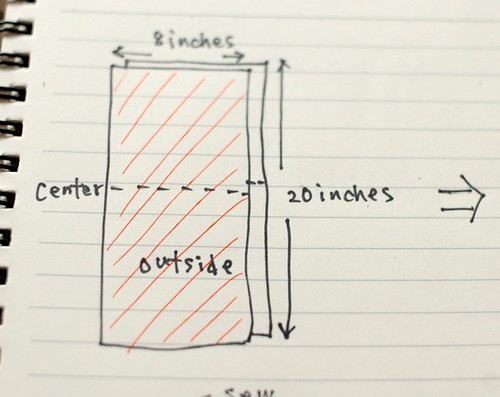
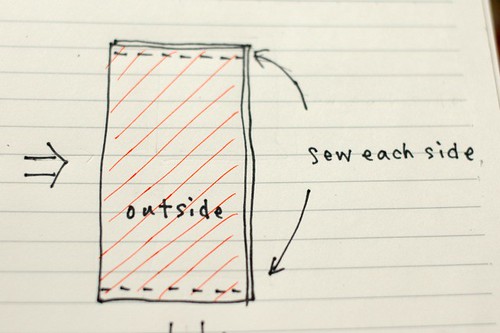
Then put them making the right side inside, and sew each edge.
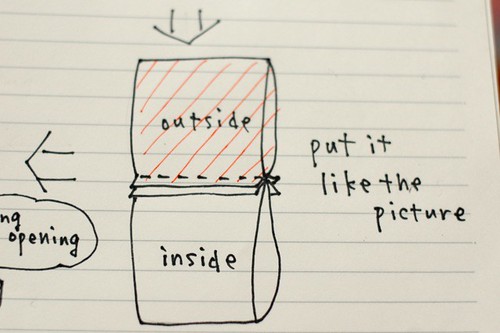
Put it like the picture.
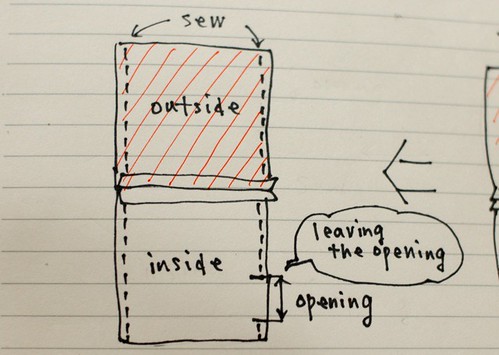
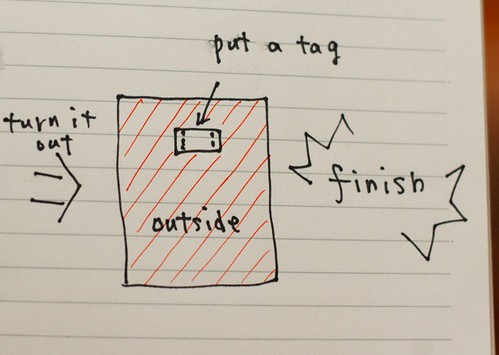
And sew the side lines, leaving a opening space to turn it out. It's better to be on the inside fabric.
Turn it out from the opening and close it.

Turn it out and put a tag on the outside. You did it.
It's very simple and you can make it in your favorite size.
By the way,,,
I'd like to do a giveaway to whom read all this long post!
I want to make two more bags like the red one, and put something in them as a gift.
So I can choose three persons for this giveaway.
If you want to enter this giveaway, just leave a comment on this post, till 6 am of
17th October(EST).
Please make sure that when you are chosen, I should contact to you. At the 17th October, I'll write the names of the winner in the new post, so please come back here to check it out.
If you have any questions about it, please feel free to write me.-> maimairuru(at)gmail(dot)com.
Have a good day (* v *)!!!!!
!!!!! Thank you very much! I closed the entry for the giveaway. !!!!!


225 comments:
«Oldest ‹Older 201 – 225 of 225Oh I like this idea! I think this could make a lovely binding for a scrappy quilt. And thank you for the giveaway!
I am a new visitor from SewMamaSew - I love your photos and beautiful work. I will be back to read some more!
i love your creations and your simple and accurate instructions
eleni
I think your scraps are much sweeter than any I have -- nonetheless, I think I need to try this tutorial, it's so cute! I can imagine my friends loving it as a bracelet. Thanks for sharing!
(danica [@] dunphey [.] com
Thank you for the tutorial! Something new to try with all those little scraps...
- Aleel
Super good idea for using up scraps and a great project to carry along while waiting. Thanks for sharing!
Thank you for the great tutorial. Your little bag and drawstring are sooooo cute!!!!
I love it. What a great idea!!
You are amazing! You always have something wonderful to share! Thank you so much for all that you do!
Emily xx
You make beautiful things, thank you for posting this tutorial. ryansarahn@gmail.com
I feel very happy about exploring your sight and learning from you! Simply Beautiful!!
Hello Mairuru, My name is Lorena, I am from Argentina in the other side of the world. Your blog is very lovely, it like so much!!!!!
You are so inspiring. What a simple beautiful idea. I love your leather labels too. Thanks for being so generous.
I have been wanting to do this for quilt binding for a while. Thanks for sharing.
!!!!! Thank you very much! I closed the entry for the giveaway. !!!!!
Thank you for sharing your wonderful tutorial. I know what I'm going to do with all those scraps now! Can't wait to get started. Great blog! yeah, sorry I missed the drawing, but I feel like I won when I stumbled across your blog :).
Linked your cute tutorial up on my blog today! http://knitandpurlgrrl.blogs.com/five_things/2009/11/5-super-cute-super-easy-gift-ideas-2.html
VERY CUTE! I linked to this on my roundup of favorite scrap buster projects - thanks SO much!
you are so talented!!
thank you for the giveaway
paz k
When you travel it is always important to have a place where you could rest,relax and have the comfort that you want.
Hostels in Buenos Aires
this is very nice, i will try to make that...
Seo Services Seo Services
cheap web hosting cheap web hosting
best web hosting best web hosting
interesting, you are an expert on this! ahaahaha
Great idea! I am going make a strip long enough to make soem flowers with it or just long enough for a bow to tie in hair for my nieces! thanks for the great ideas :)
I really appreciate your effort for sharing a great topic it's wonderful. Thank you for sharing.
I was really searching for such a nice post and got here...Thanks for sharing such a nice information, its beneficial for me...Keep sharing more.
scrapbooking supplies
Post a Comment